
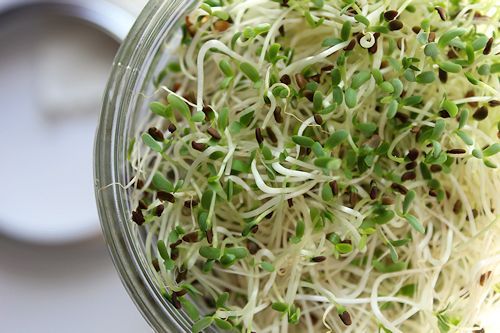
How to Grow Your Own Leafy Sprouts at Home
What You Need:
- A clean and sterilized wide-mouth Ball mason jar — If it’s not Ball brand, it may not be made in America and, therefore, may contain heavy metals that could leach into your food.
- A lid with tiny holes, such as a sprouting lid, a piece of screen, or cheesecloth — The goal is to be able to rinse and drain your seeds without losing the tiny seeds down the drain.
- Some organic seeds of any green leafy vegetable
- Fresh filtered or spring water
Instructions:
Leafy sprouts are, on average, 20 times more nutritious than the best raw vegetable you eat from your garden!
- Put 2 tablespoons of seeds in the jar in the evening and fill the jar with water.
- Leave the jar filled with water on your kitchen countertop overnight.
- In the morning, you will begin the rinse and drain process. By using a sprouting lid, or some type of lid with very small holes, drain the jar, fill it with fresh water, let it sit for one minute, and drain again. Let it sit upside down or at an angle in a way that allows extra water to drain and some airflow.
- Repeat the rinse and drain process in the evening and continue for twice a day (morning and evening) for seven days. The seven-day process allows the stems and leaf to develop, and chlorophyll develops too.
- On the seventh day, skip the last rinse so that it dries out a bit. When you are ready to move your sprouts into the fridge, replace the sprouting lid with a solid lid so that the sprouts do not become too dry.
These sprouts will last for five days in the fridge.
Tips for Making, Storing, and Eating Leafy Green Sprouts:
- Keep the jars in indirect light in the kitchen. Direct sunlight will cause the jar to get too hot inside (like a greenhouse) and mold will develop.
- The ideal room temperature is between 65 – 75 degrees with no more than 50% humidity. Gentle air movement is helpful too, but only if necessary. This can be accomplished with a small room fan.
- You can eat the whole sprout and the hull. If you have sprouting lids with different size holes, use the one with the smallest hole when the seeds are small and then you may move to one with a larger hole, once the sprout begins to grow. If you use a sprouting lid with a larger hole, then the hulls come out when rinsing.
- It’s helpful to date your jars at the beginning so you remember how many days you’ve rinsed and drained.
Enjoy!